/filters:quality(70)/prod01/prodbucket01/media/durham-university/external-location-photography-/city-shots-/82922-1920X290.jpg)
Logging in
Once you have registered for access to Hamilton, you will be notified when your account is ready to use. Hamilton is accessed remotely, so you can login to Hamilton from your local computer. There are many ways to do this, some of which are listed in the tabs below. For all methods,
- The login address is hamilton8.dur.ac.uk (or just hamilton8 from a computer on the University network), or you can also access Hamilton via the Hamilton portal.
- Use your normal University username and password to log in.
- You will need to use multifactor authentication (MFA) unless you are on the campus network or using the University's VPN.
Hamilton is based on a Linux operating system. If you are not familiar with using linux commands, we recommend that you attend the ARC course "Using Linux and the command line" or work through an online tutorial.
'At risk' periods for login nodes
Note that the login nodes have an 'at risk' period from 8am-10am on Tuesdays to allow for routine maintenance. This will sometimes cause disruption, such as a reboot, that will end login sessions and interactive processes. A warning message will be displayed shortly before this on the terminal screens of users who are logged in. Batch jobs and compute nodes will continue to run as normal during these periods.
Login methods
The login methods that are best for you are likely to depend on the machine you use to login to Hamilton and the way you need to work.
Login methods tabs content
Basic command-line
A standard way to access Hamilton is via a command-line interface, using a Terminal application (Linux/MacOSX) or Command Prompt (Windows) on your local computer. Once you have opened one of these applications, use the ssh command to login on Hamilton:
ssh <username>@hamilton8.dur.ac.uk
where <username> is your University username.
Note: to exit from a login session, type exit.
If you wish to use graphical interfaces on Hamilton from command-line access, you will need to allow Hamilton's applications to display graphics on your desktop. To do this,
- On linux, add the
-Xflag to your ssh command, e.g.ssh -X <username>@hamilton8.dur.ac.uk - Mac OS X users will need to first install Xquartz first, then add the
-Yflag to ssh, e.g:
ssh -Y <username>@hamilton8.dur.ac.uk Windows users should use a product such as MobaXterm instead of command-line access (see the MobaXterm tab).
For detailed information on how to use the ssh command, type the command man ssh on Linux or Mac OS X.
It is also possible to transfer files to and from Hamilton using the command line. There is advice about this on the Transferring Data page.
MobaXterm
MobaXterm provides a convenient way access to Hamilton from Windows machines. It is a fully-featured SSH client, providing a command prompt on Hamilton, a drag-and-drop interface to transfer files, and an integrated X server (useful for running graphical programs on Hamilton).
To use MobaXterm, first download and install it. Note that administrator privileges are not required to run the Portable version of the Home Edition. Once it is running,
- Click on the Session toolbar button (Figure 1, below), which will open a Session settings window (Figure 2).
- In the Session settings window, enter hamilton8.dur.ac.uk into the Remote host field and then
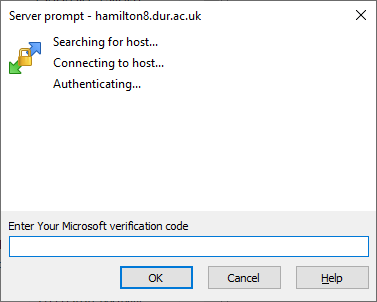
- Click Open (Figure 3).
- If this is the first time that you have logged into Hamilton from your machine, you will see a message asking you to confirm the authenticity of the host. It is normally OK to agree to this. You should not see the message on subsequent login attempts.
- Enter your University username and password when prompted - we recommend that you do not let MobaXterm save your password and tick the Do not show this message again checkbox.
Once you have logged in (Figure 4), you should see a command window on the right, with a welcome message and the Hamilton command prompt. A file browser on the left will display your Hamilton files, and dragging and dropping between this and a Windows File Explorer window provides an easy way to transfer files to/from Hamilton.
After you have created this first SSH session, a shortcut will be available in the User sessions section when starting MobaXterm.
Figure 1: Initial MobaXterm screen
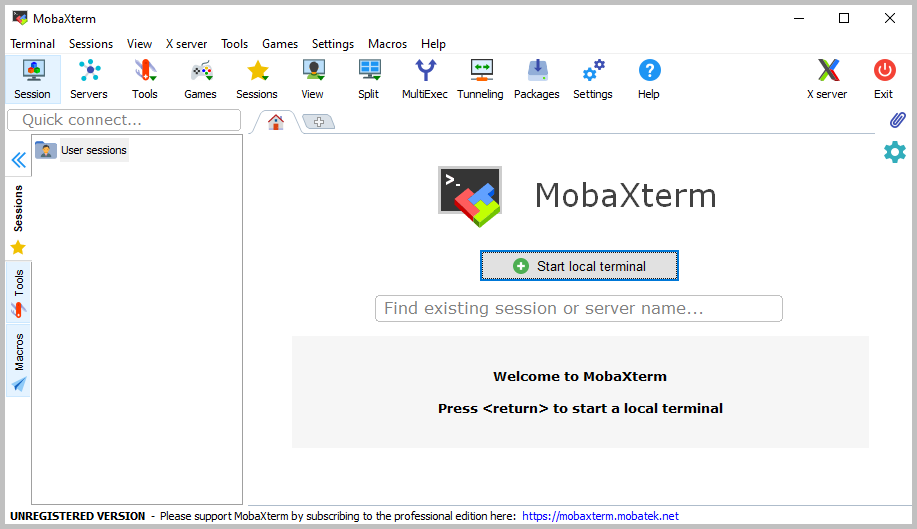
Figure 2: Creating a MobaXterm SSH session

Figure 3: Logging in on Hamilton using MobaXterm. The prompts shown depend on your choice of MFA method, e.g. notification/token
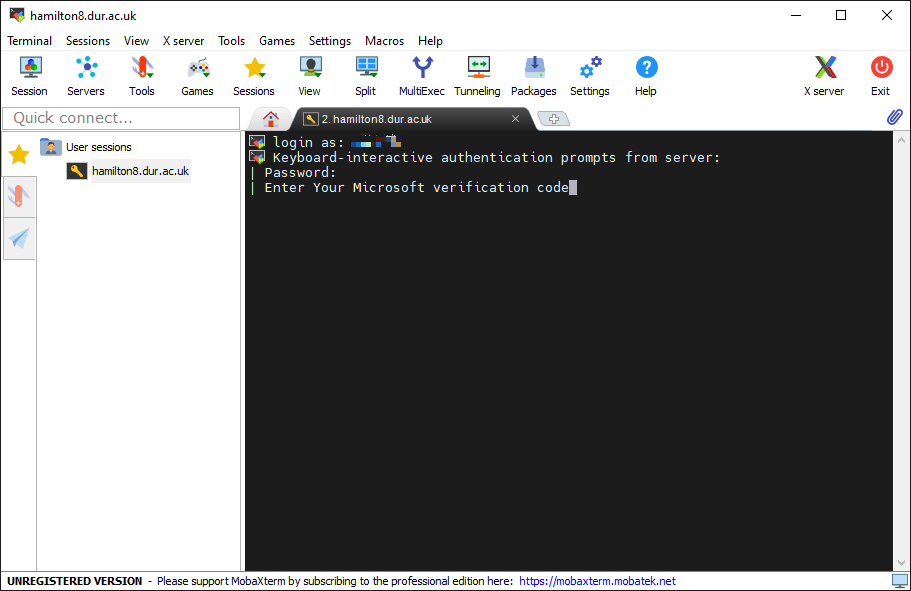
Figure 4: Hamilton SSH session, logged in

Hamilton portal
The Hamilton portal is now the preferred way to connect to Hamilton for some interactive tasks, including to run popular interactive, graphical applications and development environments. Note that you will need to be on the campus network or the University's VPN in order to access the portal.
For more information, see The Portal.
X2Go
The Hamilton portal is now the preferred method for running interactive graphical sessions on Hamilton, and use of X2Go is deprecated. However, X2Go is still available and can be used when connecting from Linux, Windows or Apply Mac OS X computers.
X2Go is superior to using an SSH client when:
- Running graphical applications on Hamilton when connecting from off-campus
You may find that such programs can be slow when using an SSH client such as MobaXterm or the Linux/Mac ssh command from home. This is because the way Linux does its graphics ("X11") is quite 'chatty', which doesn't lend itself to working over home broadband connections and wireless networks.
- Running 3D graphical applications on Hamilton
You may find that such programs crash or are unstable. This is because, although Linux graphics is designed to be network-transparent (i.e. you can run the program on one computer and open the display on another), modern day 3D graphics drivers and libraries are optimised to run games, where typically the program runs on the same computer as the graphics hardware. Due to a lack of testing by developers, there are often incompatibilities between the graphics libraries on Hamilton and those on your desktop or laptop.
Instructions for installing the X2GO client on Windows, Mac and Linux are on the X2GO website here. Alternatively, you may be able to start X2Go from AppsAnywhere.
Once you have installed and launched the X2GO client,
- Click on Session -> New session... menu item to open the Session preferences - New session window (this may happen automatically when you first run X2GO).
- Enter hamilton8.dur.ac.uk in both the Session name: and Host: fields (Figure 1).
- Enter your username in the Login: fields
- In Session type, select Published applications in the drop down menu and then click OK.
- When you are ready to login, click on the hamilton8.dur.ac.uk name in the session selection window (Figure 2), enter your username and password when prompted and then click Ok.
X2Go should now connect to Hamilton and show the session launch window (Figure 3). Once you see this, please pay attention to the row of four pale blue icons inside the grey box. These icons perform the following actions.
-
- Circular icon - open the Published Applications window.
- Folder icon - configure exporting a local directory to Hamilton.
- Pause icon - disconnect from your X2Go session, leaving programs running, allowing you to reconnect to it later. If you use this feature, you will need to make sure that all your sessions use the same login node. To do this, follow the instructions above to create an X2Go session, but instead of using the address hamilton8.dur.ac.uk, give the address of one of the login nodes explicitly, either login1.ham8.dur.ac.uk or login2.ham8.dur.ac.uk.
- Terminate icon - close your X2Go session, stopping all running programs.
-
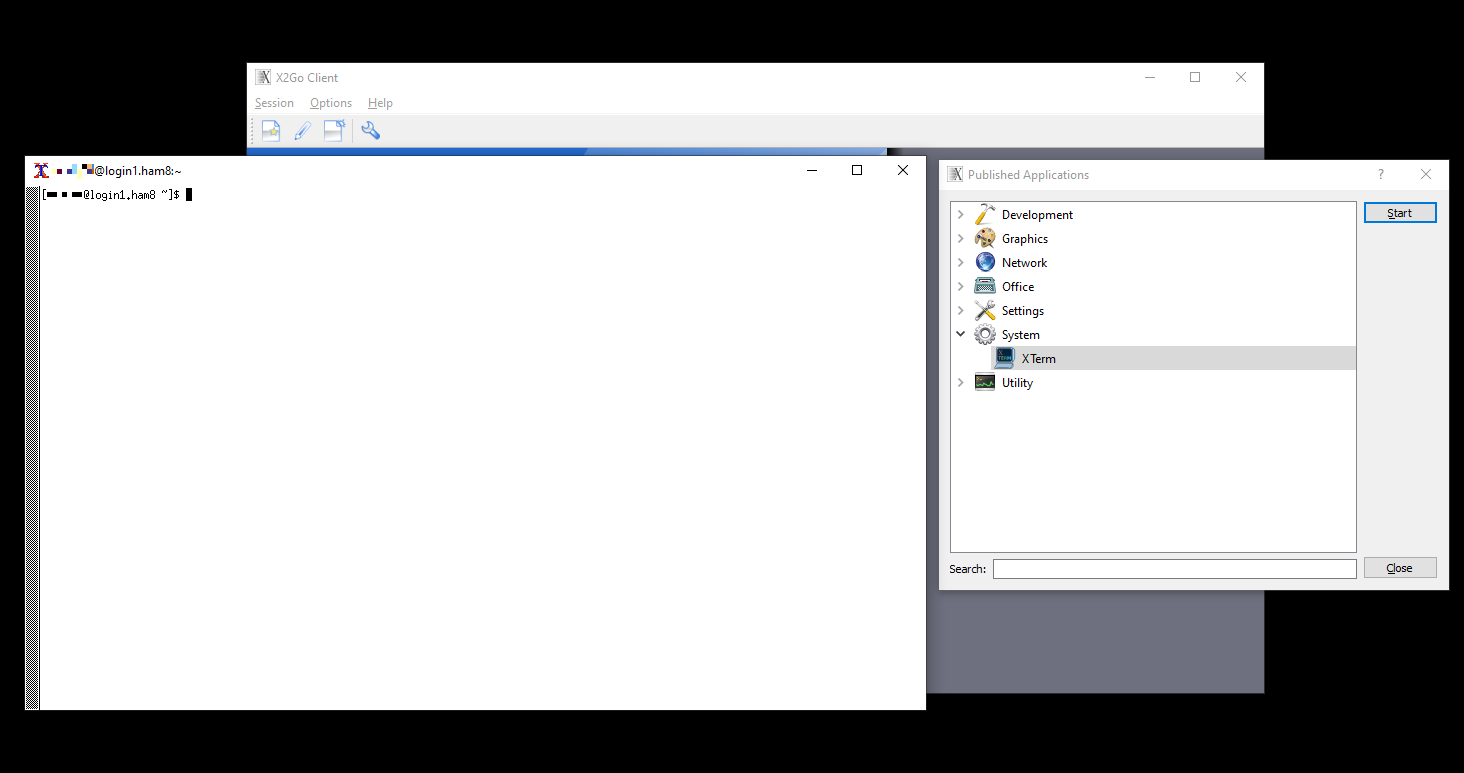
- Click on the circular icon to open the Published Applications window (Figure 4), select XTerm and click Start Figures 5,6). If there are no applications to select, please close the Published Applications window, wait for 15 seconds, then click on the circular icon again.
- A terminal window should open (Figure 7), giving you command line access to Hamilton. Use it to interact with the service and launch applications, including graphical ones, in the usual way.
Figure 1: X2Go New session configuration
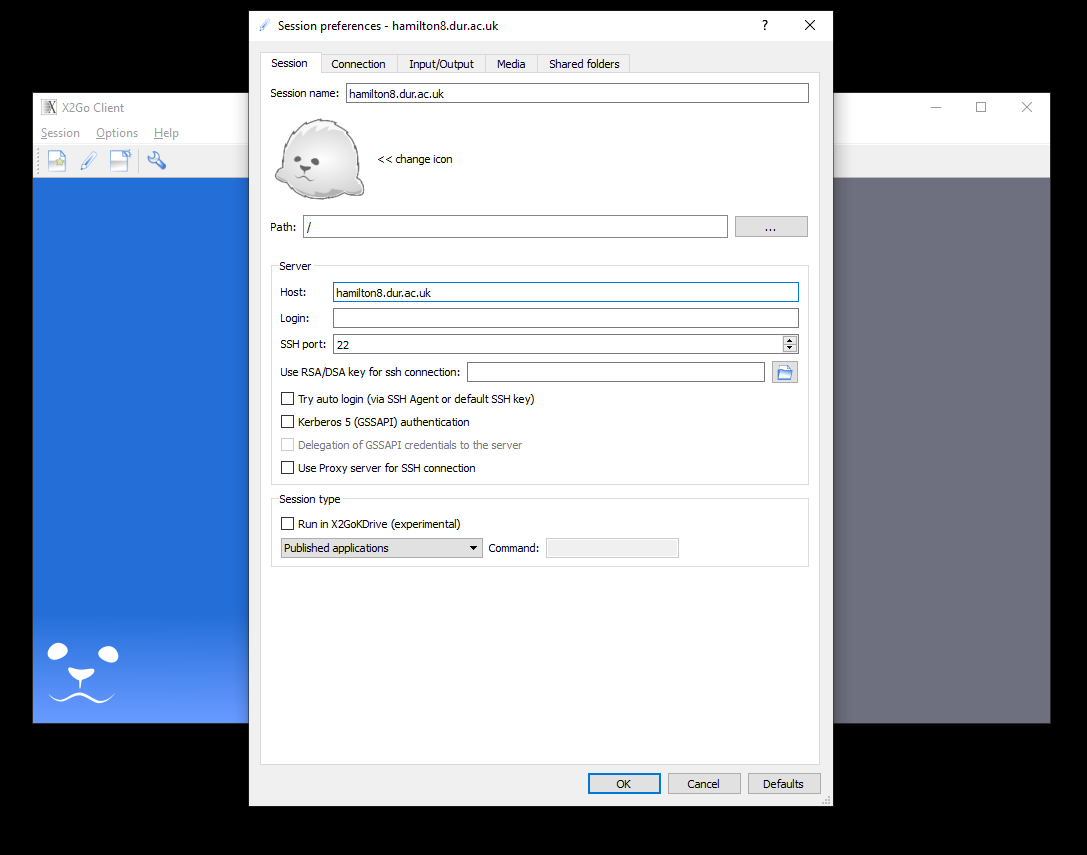
Figure 2: X2Go Session selection
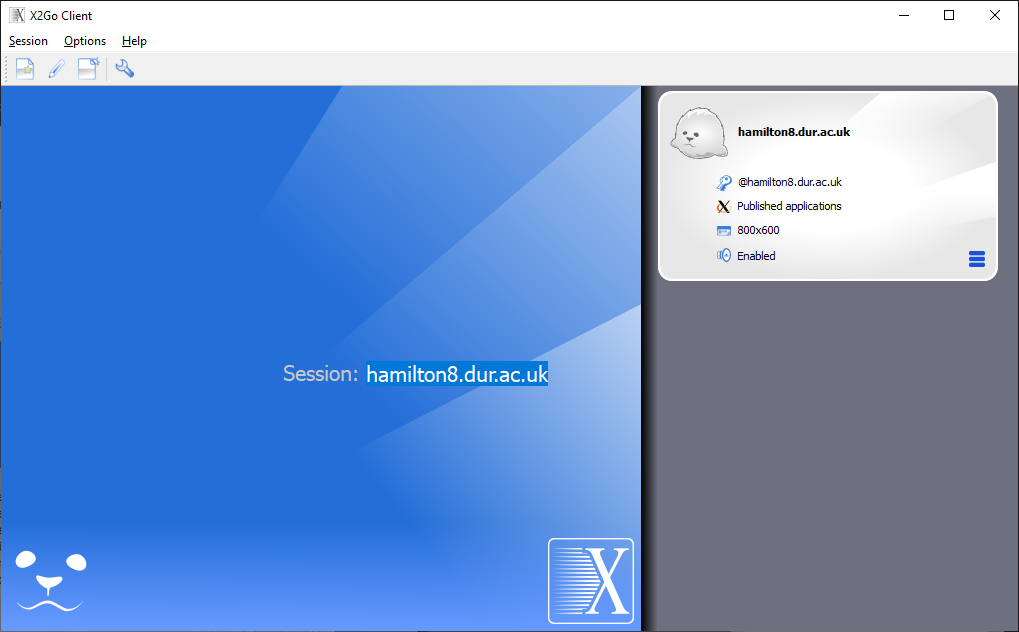
Figure 3: X2Go Session launchX2Go (for Linux, Windows and Apple Mac OS X)
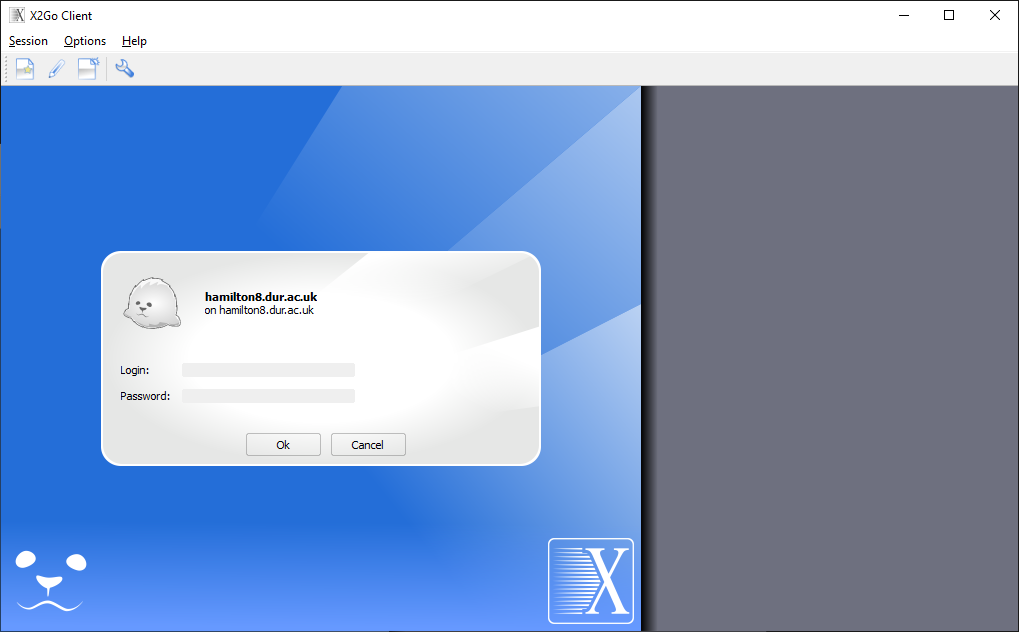
Figure 4: Logging in with X2Go. The prompts shown will depend on your choice of MFA method, e.g. notification/token.

Figure 5: X2Go session started
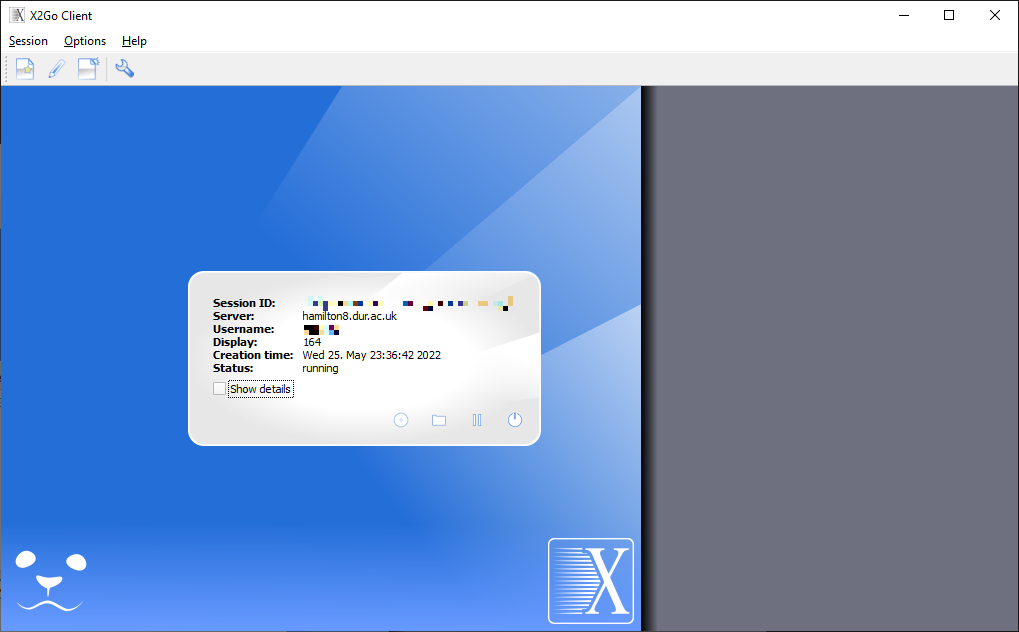
Figure 6: X2Go Start terminal
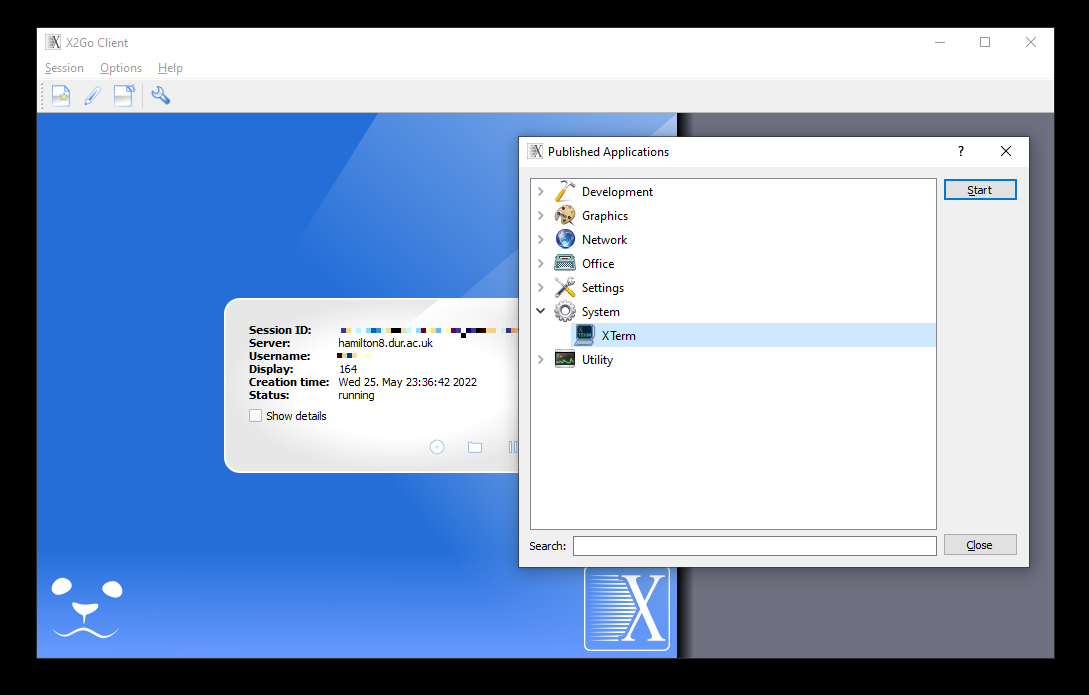
Figure 7: X2Go Xterm started
AppsAnywhere
CIS provide tools on AppsAnywhere that can be used to connect to Hamilton, including PuTTY (for command-line access) and WinSCP (for transferring files).
Configuring PuTTY
Once you have logged into AppsAnywhere, locate and click on Putty to launch it.
When the PuTTY window has opened,
- Set the "Host Name (or IP address)" field to hamilton8.dur.ac.uk (Figure 1)
- Click Open
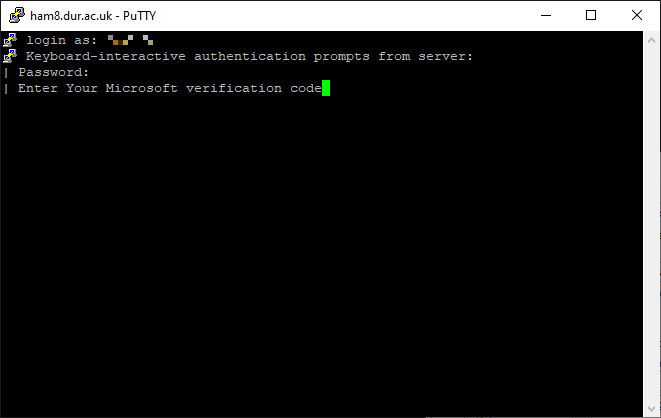
- Enter your University username and password when requested (Figure 2). You may also need to use multifactor authentication if not on the campus network or University VPN.
Figure 1: Configuring putty
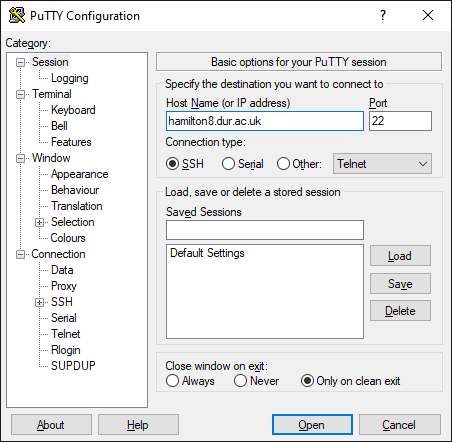
Figure 2: Logging in with PuTTY. The prompts shown will depend on your choice of MFA method, e.g. notification/token.
Configuring WinSCP
Once you have logged into AppsAnywhere, locate and click on WinSCP to launch it.
When the WinSCP window has opened,
- Set the "Host Name" field to hamilton8.dur.ac.uk (Figure 3)
- Click Open
- Enter your University username and password when requested (Figure 4). You may also need to use multifactor authentication if not on the campus network or University VPN.
Figure 3: Configuring WinSCP
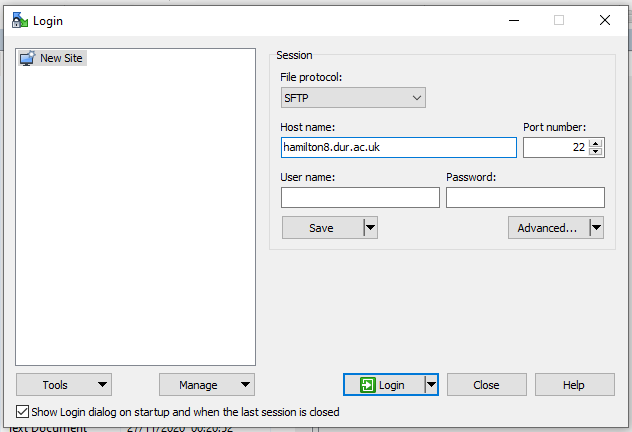
Figure 4: Logging in with WinSCP. The prompts shown will depend on your choice of MFA method, e.g. notification or token.